This is a place for FileKutz Creative Member's To Show off their project using FileKutz By LisaJane Design's. So welcome and take a look and these B.E.A..Utiful Projects and become inspired!!

Saturday, April 30, 2011

Berry Sweet - Strawberry Flourish Vine File

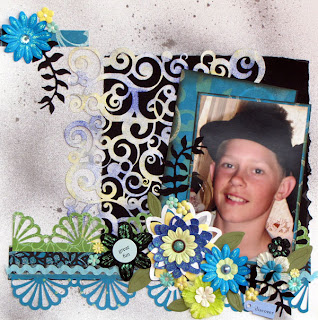
friend of my daughter has the cutest little girl and she is soo sweet........how sweet you ask...."berry sweet".  I was lucky enough to be given this gorgeous picture of her and knew that I wanted to use the STRAWBERRY FLOURISH VINE file to create this layout.  
I welded two of the vines together and used it as a background frame.  I used Glossy Accents on the strawberries to give them a nice shiny finish and popdotted them to the vine along with adding the leaves..  Not only is the file perfect for those berry picking pictures but also for those "sweet as a berry" pictures.  Thanks for looking!  Sharon


Friday, April 29, 2011

BUTTERFLY FLOURISH PAGE KIT

Hi bloggers Eve here with you again to share a cute file that you can find over HERE i really enjoyed using this versatile file as there is so much on it that you can cut out ...
I done a layout with it in the soft kaiser fairy papers from a few years back and this photo is of my little boy Mason ...Hope you enjoy my creations .


Thanks for looking
Eve xx

Thursday, April 21, 2011

FileKutz Monthly Sketch Challenge

Welcome to FileKutz Design's we are holding our 1st ever Monthly Sketch Challenge.   I am offering this freebie file of a Swirl Background DOWNLOAD IT HERE  Password is: iagreetouswirl and the only rule is you must use it, or part of it on your card, layout or project.

The File comes in WPC, GSD, SVG, AI, KNK, MTC AND SCAL2.  If you'd like a PNG format for digital email me (I just don't add them to the zip files as they make the zip so large)


To play along, just post your sketch project to your blog or gallery, then include a link in the InLinkZ  form at the bottom of this post so we can all easily find each other.  The winner will be choose on May 9th, so you have just a little over two weeks to work on your idea!!   Don't have a Blog? No worries, just email me your photo and description of what you did and used and I will post it on my blog for you and link it here.

The winner will win 5 free files of there choice from ANY of Filekutz Design's. You can see all of my design's between these two places HERE  and HERE .  

Also Sharon S. a DT member here at FileKutz is having a giveaway of her own for FileKutz, Read about it HERE

To qualify for the prize drawing, have your layout, card or  project linked here by noon EST on Monday, May 9th.   To have a chance of winning this awesome prize, here's this weeks sketch for you to be inspired by in your entries... 


Here is a picture of the Cut File offered for this challenge:


How about some samples to jump-start your creativity! Here's what our fabulous Design Team have made so far this week!


We hope you enjoy the sketch and have time to join in the fun with us!  Please remember to leave a direct link to your NEW creation's post with InLinkz below, not just your blog and include a link back to FileKutz Sketch Challenge in your post to be eligible to win this weeks fantastic prize. Thank you :)


I do have some tips for cutting files like this, with lots of small parts..

1. Make sure your blade is sharp or new.. I use a seperate blade for cutting like this that I swap out when I am done cuttin detailed cuts. 

2. Turn your paper upside down and do a double cut, it gives smaller cut a much better cut and if you have a white core paper you won't see the white core cutting upside down.  (Just make sure you flip your design, if needed)

3. If you have adjustable rollers on your machine move them to be on top of the paper, to hold in place better when doing a double cut. 

4. Ungroup or Unweld the whole file (if it is large and has small parts inside) and cut the inside pieces before you cut the outside stroke/line.  This will save you from cutting up your small parts and getting broking pieces on your finished background and small pieced files. 

5. If your 1st cut don't come out well, inlarge the or outline the outside stroke just a little, then delete/remove the original outside stroke,  then cut small pieces 1st, then cut the new outline you made. 

6. Some machine's are just not cut out for cutting small pieces.. if this is the case with your machine and you can't cut a file of mine because of small pieces, email me and tell me about it, your issue and the machine/program you use, and I will see if I can redesign with a little larger pieces (I can usually do this in most cases).. as I have a few times before for a customer who uses a Silhoutte machine and has to cut smaller due to the max cutting of 11x8".

Tuesday, April 19, 2011

Easter Card

Here is an Easter card I made. I just love how it turned out.


Ingredients:

Patterned paper (either from DCWV or some other paper stack)
Bazzill cardstock
Mica/Metallic papers from PaperTemptress in several colors (for the flowers and stripes)
Bazzill In Stitch'z silly stitches template and French Vanilla floss
Easter Chick in Egg Shell cutter file from FileKutz by LisaJane
Yellow Flock
Self-Adhesive Pearls


Details:

I wanted my chick to look fluffy/fuzzy so I decided to coat him in yellow flock. I decorated the egg shell with the provided flowers and added some pearls to the centers. I cut extra flowers when I was decorating the egg and I thought the background paper could use something extra so I added some of the flowers and used a yellow gel pen for the centers. I pulled out my Bazzill In Stitch'z templates to give some extra detail to the blue cardstock piece.


KellyS

Saturday, April 16, 2011

Sunrise Flight

I wanted this layout to be very simple and to concentrate on the beautiful sunrise image. When I found LisaJane's Evergreen border, I knew that I had to use it to enhance this layout. I choose a single set of trees and cut them out in various colors and then placed them throughout the layout.

TECHNIQUE TIP:  Using the same embellishments three times in this layout creates a visual triangle that helps move the readers eyes through the layout and pulls it all together. The natural fiber paper provides a great base for the trees and definitely mimics the rugged Alaskan coastline where this photo was shot.

SUNRISE FLIGHT - November 24, 2010 - Haines, Alaska JOURNALING:  As the slow winter sun rises, this eagle and Matt were treated to a beautiful orange glow.PHOTOS:  Bald Eagle images by Matt Shetzer of Shetzers Photography SUPPLIES USED:  Evergreen Border SKU: LK00265 by LisaJane at Filekutz, Sketch by Becky Fleck Page Maps 2 book (page 60), The Paper Studio Affinity cardstock, The Paper Company Kraft cardstock, K&Company Julianne patterned paper and journal tag, Stampabilities Brown ink, Tim Holtz Spiced Marmalade distress ink, Font:  My Own Topher, Handmade paper, Doodlebug Design Paper frills, JudiKins textile cube stampTECHNIQUE TIP:  I wanted this layout to be very simple and to concentrate on the beautiful sunrise image.  When I found LisaJane's Evergreen border, I knew that I had to use it to enhance this layout.  I choose a single set of trees and cut them out in various colors and then placed them throughout the layout.  Using the same embellishments three times in this layout creates a visual triangle that helps move the readers eyes through the layout and pulls it all together.  The natural fiber paper provides a great base for the trees and definitely mimics the rugged Alaskan coastline where this photo was shot.
SUNRISE FLIGHT - November 24, 2010 - Haines, Alaska
JOURNALING: As the slow winter sun rises, this eagle and Matt were treated to a beautiful orange glow.

PHOTOS: Bald Eagle images by Matt Shetzer of Shetzers Photography

SUPPLIES USED: Evergreen Border SKU: LK00265 by LisaJane at Filekutz, Sketch by Becky Fleck Page Maps 2 book (page 60), The Paper Studio Affinity cardstock, The Paper Company Kraft cardstock, K&Company Julianne patterned paper and journal tag, Stampabilities Brown ink, Tim Holtz Spiced Marmalade distress ink, Font: My Own Topher, Handmade paper, Doodlebug Design Paper frills, JudiKins textile cube stamp

Here is a photo of the complete set of Evergreen Borders that is available for purchase at FileKutz. I used the third set in this layout.

Thursday, April 14, 2011

Garden of Life

Sometimes all it takes is a phrase or saying that starts motivation for a layout and then adding a FILEKUTZ by LisaJane is sure to complete the inspiration.  I have created this layout using Flourish Flower Frame lk00265....I love the gorgeous flourish and how you can layer the flowers from this file.  The mat is very versatile and can be placed vertical (see file image) or horizontal (like my layout).  
After cutting and layering the flowers from the file, I also added some Recollections tiny mulberry roses as centers and throughout the layout.  I inked the silver Making Memories bling that I had a teal color and added some small bees and ladybugs to give it more of a "garden" feel.  I then dug into my old fiber drawer and added some around the flowers and clouds to give it a "whispy" look.  Tiny alphas spell out the saying "If Mothers Were Flowers in the Garden of Life, I Would Pick You". 
More details and close ups are on my BLOG .
You can find this FILE and many other great ones HERE.  
Thanks, Sharon


Monday, April 11, 2011

EASTER CUP CAKE WRAPPERS

Hello everyone Eve here with another layout i have done using the easter eggs from a file at Filecutz ..you can view the file HERE ...I have only used the eggs from this set to create this layout , i had some easter egg foils left from last easter so i backed the cut out eggs with it to create some coloured eggs ..
supplies used are bo bunny  pedal pushers paper and chipboard range .

Thanks for looking
Hugz Eve

Friday, April 8, 2011

Toolbox Birthday Card

I needed a birthday card for my Father-in-Law and LisaJane had the perfect file. I used her Father's Day or Birthday Card file (lk00098) which you can find HERE. I cut the tools out of a shiny silver cardstock so they really look like metal. The front of the toolbox is embossed with the Oriental Weave 5x7 embossing folder to give it some texture. My FIL is quite the handyman so I know he will appreciate the card.


KellyS

Tuesday, April 5, 2011

Look Out Below

I've been working feverishly to finish up my Bald Eagle scrapbook by the time we leave here in two weeks. It's been great fun, but I will be glad to get back to some different types of layouts and be able to start on our trip through Alaska last summer.  The Bald Eagle scrapbook will contain 28 layouts.

LOOK OUT BELOW - October 31, 2010 - Haines, Alaska JOURNALING:  Bald Eagles battle for a salmon meal in the last run of the season.PHOTOS:  Bald Eagle images by Shetzers Photography SUPPLIES USED:  K&Company Julianne patterned paper and mats, Kraft cardstock, Ranger Tim Holtz Distress ink (Antique Linen, Weathered Wood), Judikins Treasure Cube and Textiles Cube stamp, DCWV Neutrals cardstock, Bazzill Basics Just the Edge, Stampin Up Notes and Details and Dot Dot Dot stamps, Eagle cut file by FileKutz by LisaJane, Smooch pearlized ink, Sketch by PageMaps 2 (page 104), Font: Evie's handTECHNIQUE TIP:  I used four different borders by Bazzill on this page.  Two of them started out being off white so I used my stamps and inks to colorize them and add more texture to the layout.  Another one started out to be off white and I decided that a pale blue would give a bit more seperation to the zig zag border so I sponged some of the Tim Holtz weathered wood ink onto it to recolor it.  The bluish textured flowers also started off in plain off white and with my stamps, I blended them in with the theme of the layout.


LOOK OUT BELOW - October 31, 2010 - Haines, Alaska

JOURNALS: Bald Eagles battle for a salmon meal in the last run of the season.

PHOTOS: Bald Eagle images by Shetzers Photography

SUPPLIES USED: K&Company Julianne patterned paper and mats, Kraft cardstock, Ranger Tim Holtz Distress ink (Antique Linen, Weathered Wood), Judikins Treasure Cube and Textiles Cube stamp, DCWV Neutrals cardstock, Bazzill Basics Just the Edge, Stampin Up Notes and Details and Dot Dot Dot stamps, Eagle cut file by FileKutz by LisaJane, Smooch pearlized ink, Sketch by PageMaps 2 (page 104), Font: Evie's hand

TECHNIQUE TIP: I used four different borders by Bazzill on this page. Two of them started out being off white so I used my stamps and inks to colorize them and add more texture to the layout. Another one started out to be off white and I decided that a pale blue would give a bit more separation to the zig zag border so I sponged some of the Tim Holtz weathered wood ink onto it to recolor it. The bluish textured flowers also started off in plain off white and with my stamps, I blended them in with the theme of the layout.

Here is a closeup of the wonderful cut file from LisaJane at FileKutz.  What a great way to finish off this layout.

To purchase this wonderful file, please click on the photo above to be taken to the website..

Monday, April 4, 2011

Easter Egg Hunting File

Bunnies are Brown, bunnies are white.

Bunnies are always an easter delight.

Bunnies are cuddly, the large and the small,

But I like chocolate ones best of all!!


Hello all, this is Sharon and we have all noticed that Spring is popping up everywhere, from the small buds blooming to the songs that the birds are singing....many new beginnings....perfect time for my new beginning---my first post and layout as DT here. I was so excited to create a spring layout, to use a color that I hardly ever use (purple) but mostly to use this adorable svg file called EASTER EGG HUNTING w/RABBIT from FileKutz By LisaJane. I wanted to create this layout with the bunny faceless but as you can see at the file image below, the file does include an adorable face for it.

I started creating my layout by blending distress ink on the edges of the white cardstock, using the Fiskars Read Between the Vines punch on the purple cardstock, and added various easter papers and a cardstock mats. Then I got to work on cutting and creating with the file. I like to create depth so the fence was cut, crinkled and chalked with distress ink and then I cut the grass 6 times - inked, crinkled and assembled them into one piece. I cut out the bunny pieces and the basket pieces - finishing them up by chalking and assembling them also. I put together the finished pieces and added some flowers, ribbon and a poem. Now all I have to do is take that perfect picture on Easter to add to my layout...gotta love being a page ahead!! This was a fun file to play with and I know I will be using these pieces, like the fence, over again on other layouts.


Sunday, April 3, 2011

TATTERED FLOWERS

Hi Eve here with you today LisaJane asked me to work on the tattered flowers file you can find it HERE and this is what i have managed to come up with .
I love this file as its got so many different petals to work with , just let your imagination run wild with this file and you can create some amazing flowers for your scrapping stash .
I have used kaiser papers and some added prima flowers to my layout and as always kindy glitz and liquid pearls im so hooked on liquid pearls at the moment .

Anyway here is what i done i hope you like it

Thanks for looking
Hugz Eve